API for Beginners
![]()
This article will try to explain how API keys are used by Hummingbot and show you step-by-step on how to correctly setup and connect API keys.
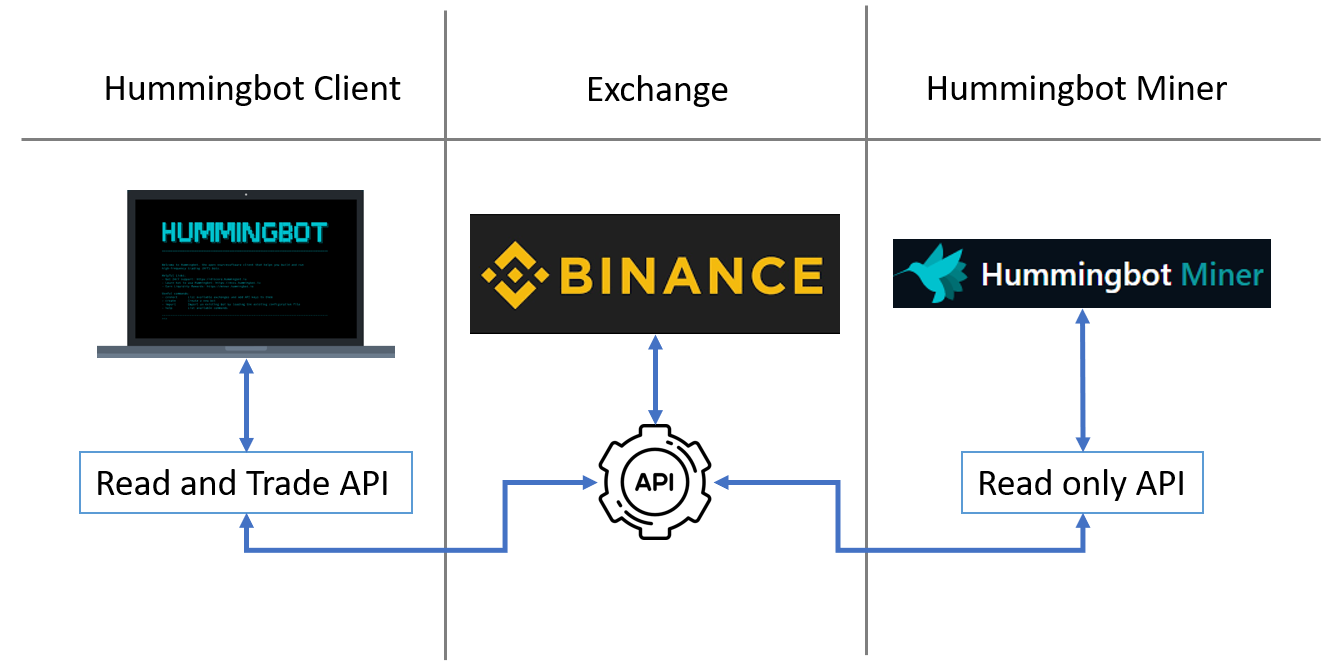
To start off things, we need to have a firm grasp on the difference between the two main tools of Hummingbot namely the Hummingbot Client and Hummingbot Miner. In this article we will refer to them as Client and Miner respectively. We will also include an Exchange in the picture to explain and show how they all work together. Currently, we support 4 exchanges for Liquidity mining (AscendEX; Gate.io; KuCoin and Binance). In this article, we will be using Binance. You can also go to our Exchange Connector list to find out if your exchange is supported by our Hummingbot Client.
Overview
Hummingbot Client
- Client is the open source software that helps you run trading strategies that automates the execution of orders and trades on various cryptocurrency exchanges and protocols.
- It is the software installed on your local machine or in the cloud of your own choosing. It is highly recommended to update your Hummingbot client to the latest version to avoid bugs and to make sure that your bot is operating optimally.
- For Hummingbot Client to work correctly, we need to create an API key on an Exchange that has both Read and Trade access enabled.
- For new users, it is recommended to use no IP restrictions when setting up an API Key. For expert users, enablement of the IP restriction secures your connection by ensuring that the API requests can only originate from your allowed IP address/es.
Hummingbot Miner
- Miner is the web application or platform of Hummingbot where users can track their progress and setup their API keys and wallets in order to be properly rewarded.
- For Miner to work correctly, we need to create an API key on an Exchange that has Read access enabled.
We do not need to provide Trade access to Miner as it will never execute trades. - Miner only needs Read access to pull order history placed on exchanges. The order history is used to create snapshots which is the basis for calculating rewards.
- For IP restriction, we need to make sure that it is disabled.
- The reason why IP restriction needs to be disabled is because the IP address that the exchanges see are that of the Miner itself. Since Miner is a web application which has numerous dynamic servers in the background, it will be tiresome to track and only allow the IP addresses of those servers.
We will leave the IP restriction disabled to keep it simple.
Exchange
- Exchange/s in our context, whether centralized or decentralized, are online platforms that we use to buy and sell cryptocurrencies. In the case of Hummingbot, this is where the Client places buy/sell orders and where Miner gets order history from.
- This is also where we create the API needed to run Hummingbot.
- All available exchange connections are available here. For Liquidity Mining we only support 4 Exchanges (AscendEx, Binance, GateIO, KuCoin).
How they all work together
Assuming that we have completed installing the Client and creating a Miner account, we will go to Binance Exchange to create the necessary APIs.
Knowing that we need to create 2 (two) separate API keys, we can go ahead and create the API needed for the Client followed by the API for Miner.
Creating and connecting a Read and Trade API for Client
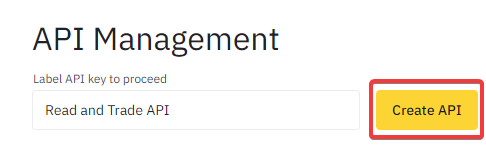
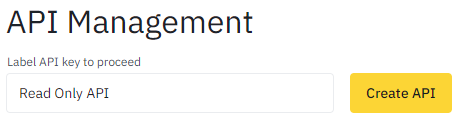
- On our Exchange, (in this case - Binance) go to account's API Management.
- Create a new API and label it as "Read and Trade API" to make it clear what the API will be used for.
- On API restrictions, enable Reading and Spot & Margin Trading. Don't put any IP access restrictions for now.
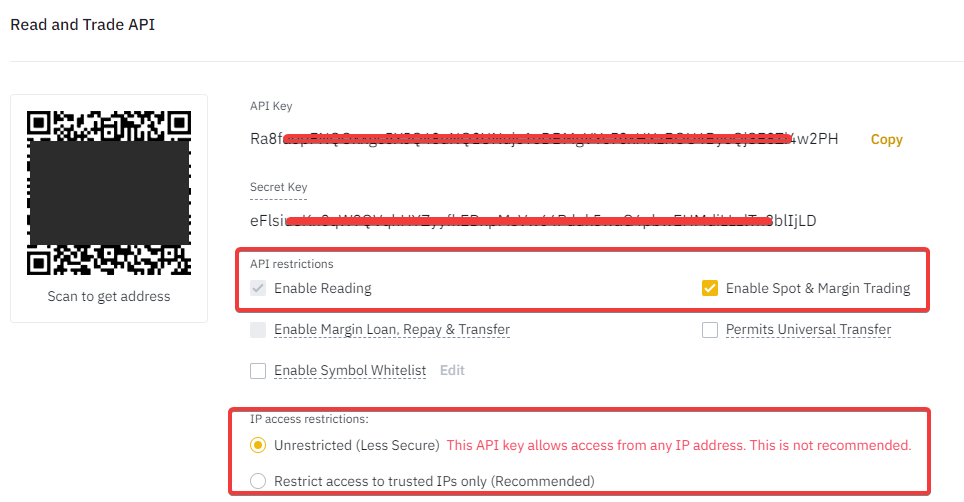
- Copy both the API key and Secret key, make sure to keep it secure and not to share it with anyone.
Also know that this is the only opportunity to see the Secret key. Just create another API key if the Secret key is lost. - Connect the Read and Trade API key to your Client with the command "connect binance" (connect [exchange]) and enter the keys as required. You can paste by pressing shift + right click.

- Run the "balance" command to confirm that the Client is able to get data from your Binance (exchange) account.
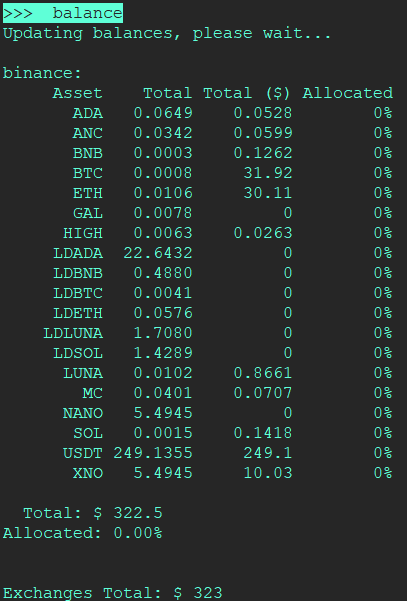
- Once balances are displayed, it means the setup is successful and your bot is now connected properly.
Creating and connecting a Read Only API for Miner
- Create a new API and label it as "Read Only API" to make it clear what the API will be used for Miner.
- On API restrictions, only enable Reading and make sure to to select Unrestricted on IP Access Restriction
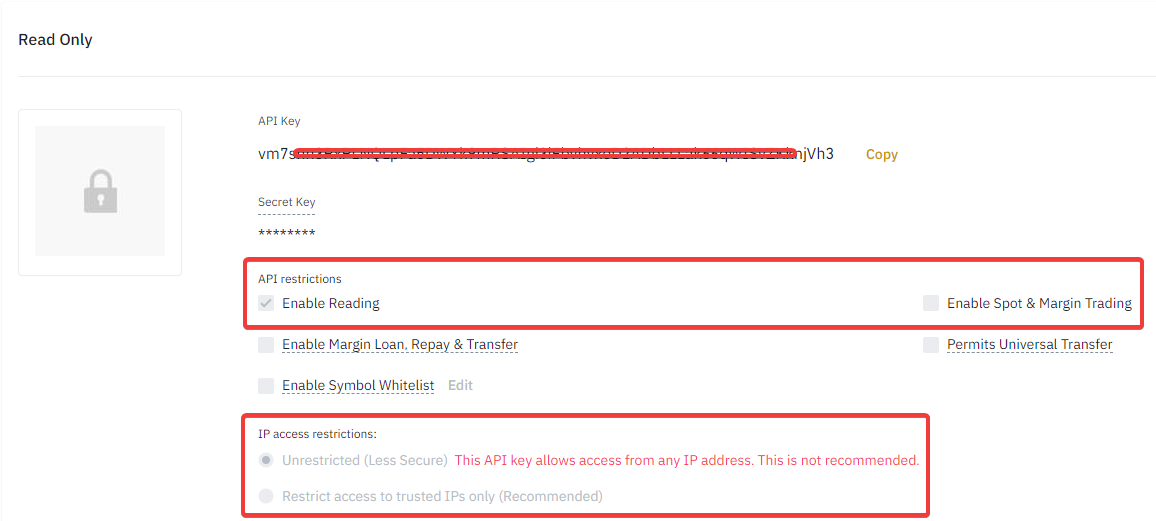
- Copy both the API key and Secret key, make sure to keep it secure and not to share it with anyone. Also know that this is the only opportunity to see the Secret key. Just create another API key if the Secret key is lost.
- On our Miner account, go straight to Settings > Exchanges to connect Read Only API key.
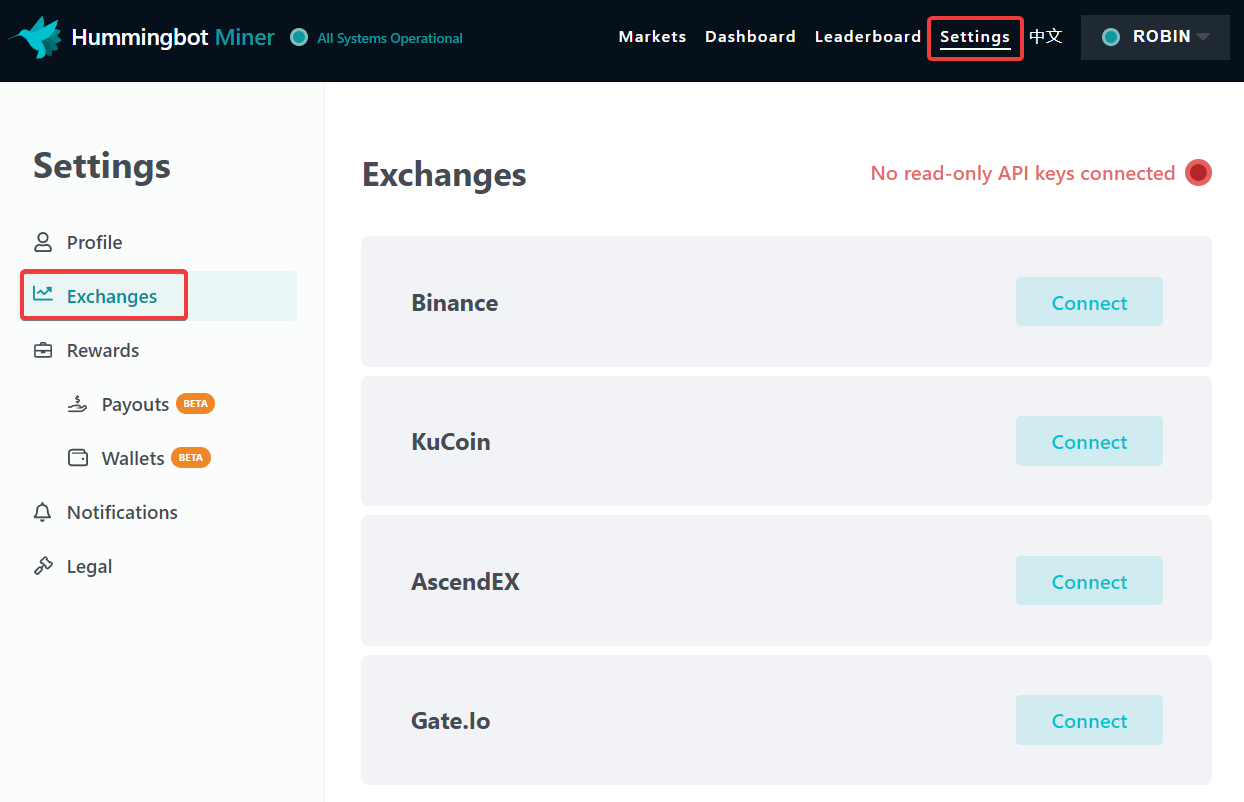
- Enter the API key and Secret key of your Read Only API and click Connect.
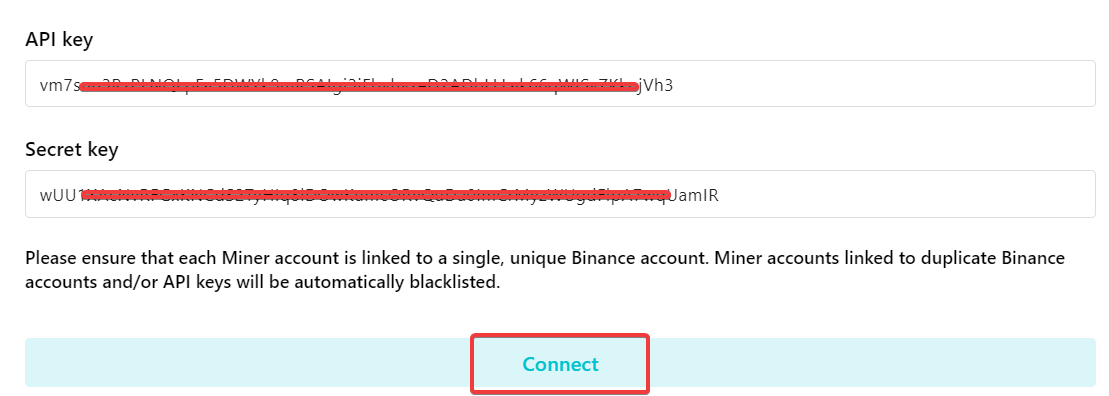
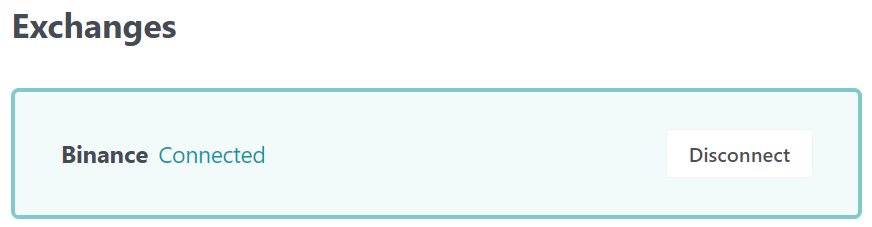
- Your Miner is now connected properly
- The next step is to run a liquidity mining strategy and start earning potential rewards!
Running a Liquidity Mining strategy and checking progress on Miner
- Create a basic liquidity mining strategy to get a feel for Hummingbot.
Check the log-pane output on your Client, to confirm that orders are being placed.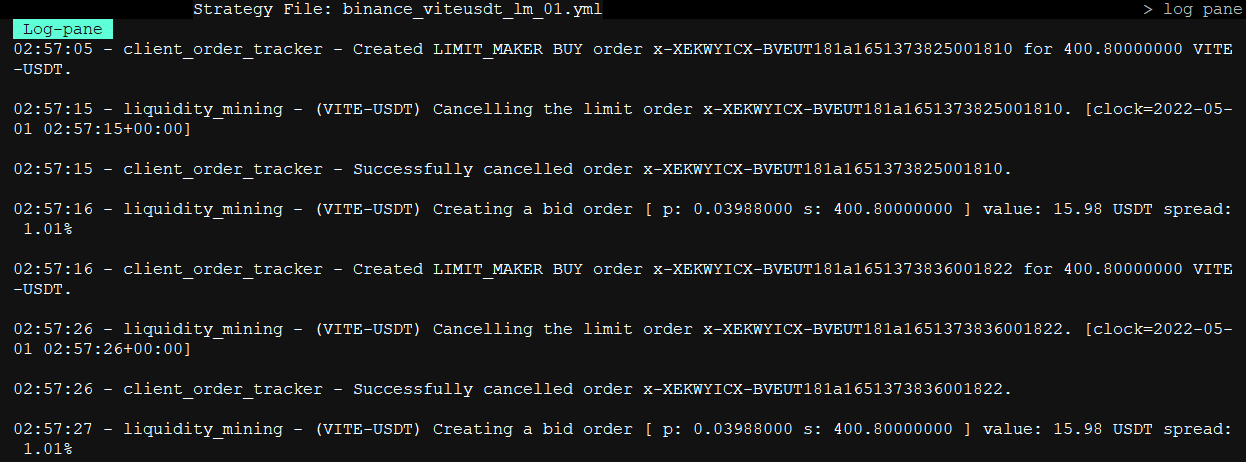
- As these orders are made in the Client, they should reflect on your Binance account.

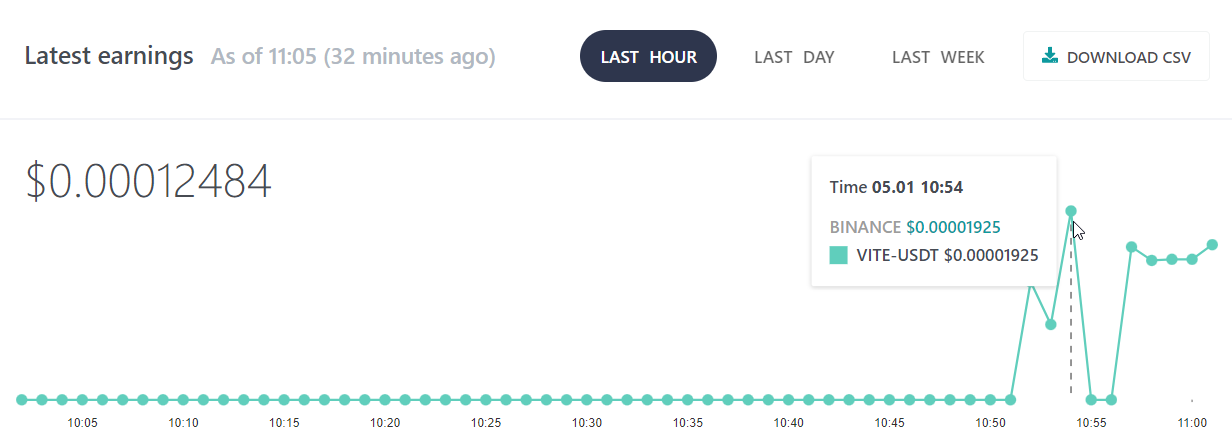
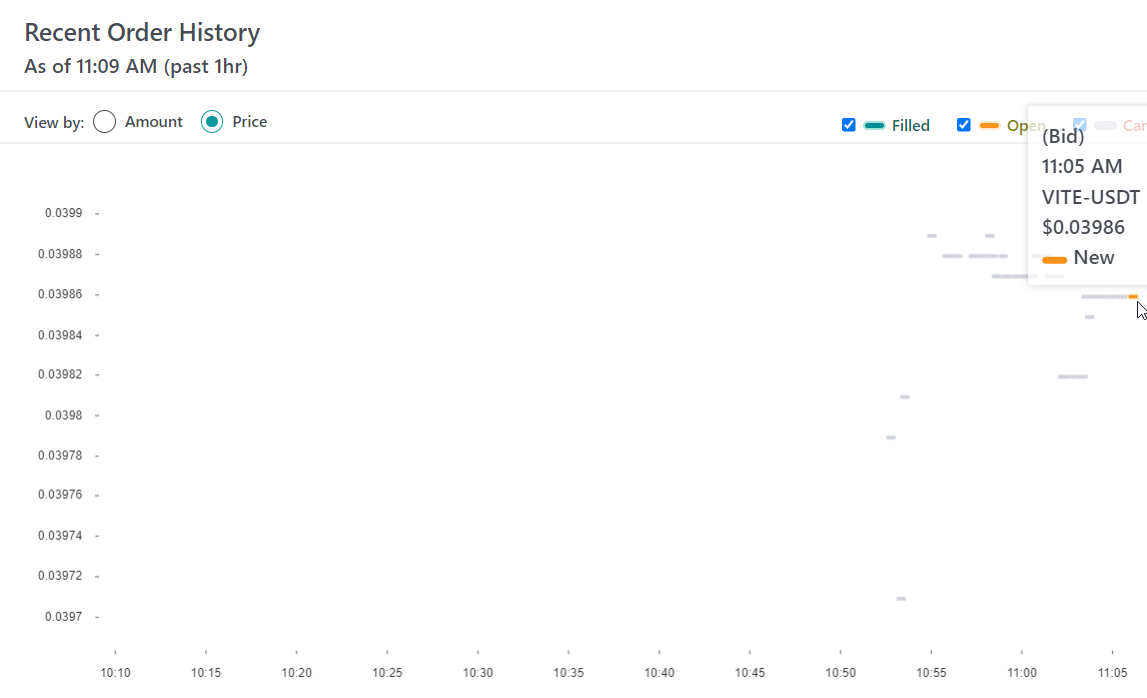
- Checking back on Miner, Orders should start to appear on your Miner Dashboard, this info (orders) should reflect in real-time. At this point, rewards would not show yet.
- Rewards will start to calculate after at least 30 minutes. After such, rewards should appear on his Miner Dashboard.